Video 1: Hi there, and Welcome to Rio!
Before we begin setting up your router, you will first need to download the Free Rio mobile app.
To get the mobile app, go to your google or apple app store, look up Rio Router, and find the app that looks like this.
Once you have found it, go ahead and download it. We can now begin.
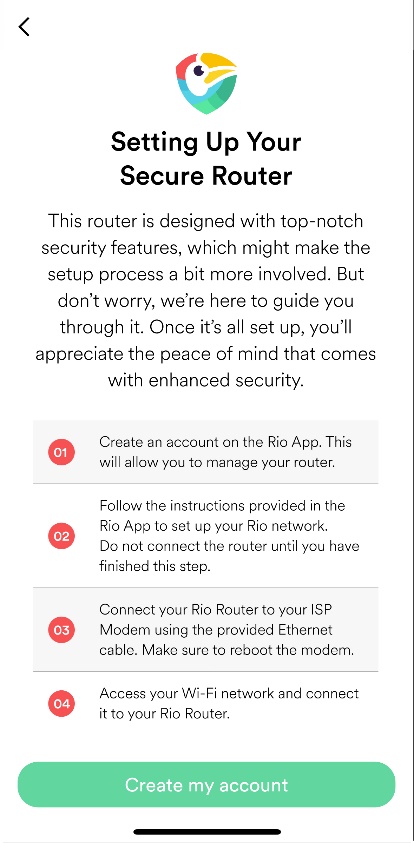
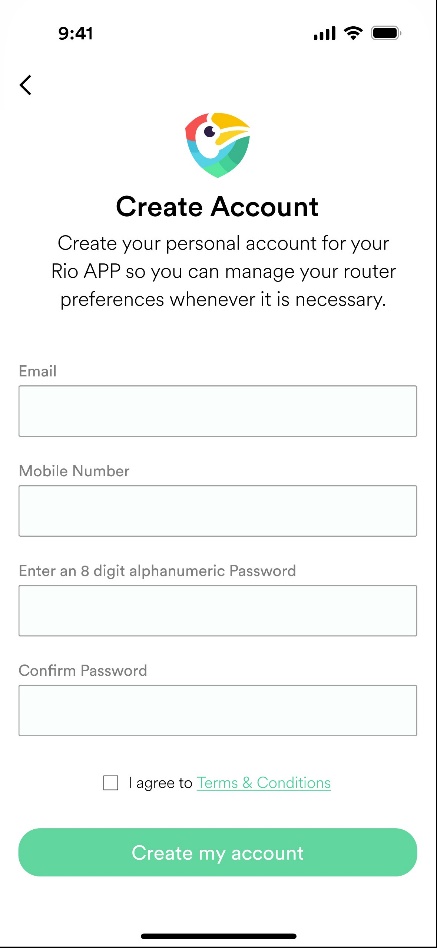
Open up your Rio mobile app and click create your account.
After putting in the email, password, and mobile phone number youd like to use, you will receive an email verification with a code to confirm its you.
You will also receive a text verification to the mobile phone you've selected.
Once completed, your Rio account is now activated.
Now that your Rio account is up and running, its time to get the physical router up and running too.
Video 2: With your Rio purchase, your order will include the power adapter, 1 ethernet cable, and the Rio Router. Take all the supplies out of the package.
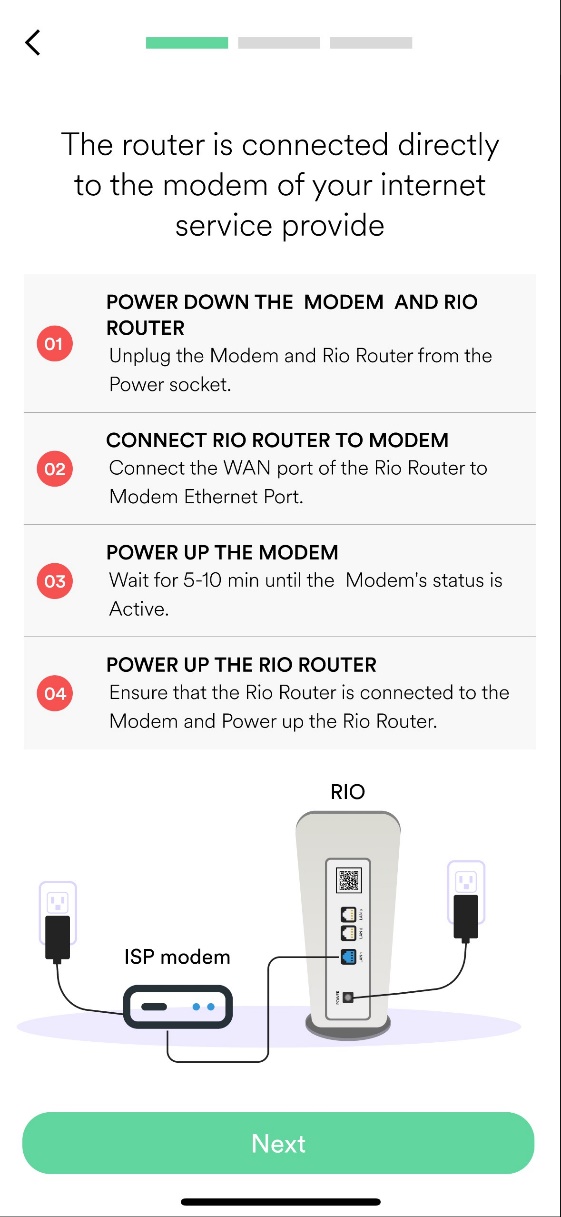
Unplug your previously connected router from the modem, and unplug the modem from your wall outlet so that there is no power.
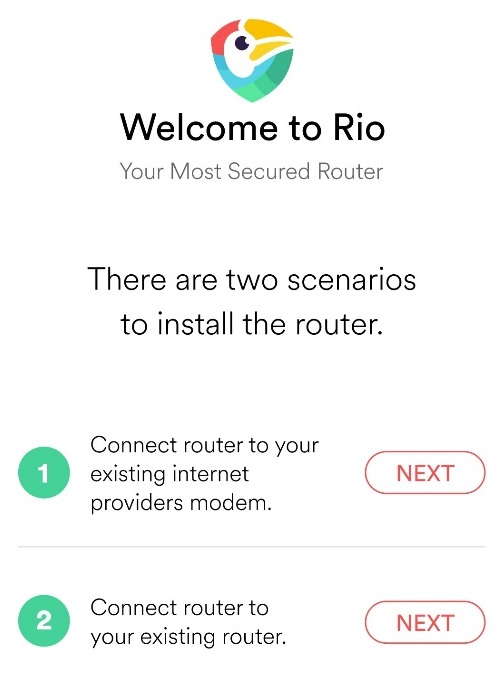
RIO allows you the ability to also piggy back off your previous connected router as well. For this you will plug the ethernet from RIO into the back of your connect Router when the time comes.
Take the provided ethernet cable and plug one end into the blue WAN port on the back of your Rio Router, and the other end into the internet port on the back of your Modem.
Now plug both your modem and RIO into the wall outlet so that they can gain power. Typically Modems reaching active status takes between 5-10 minutes so you can walk away for a bit while this does its thing.
Once you're back, its time to power on your Rio.
On the back of your Rio Router, you will see the on/off push button. Go ahead and push in like such.
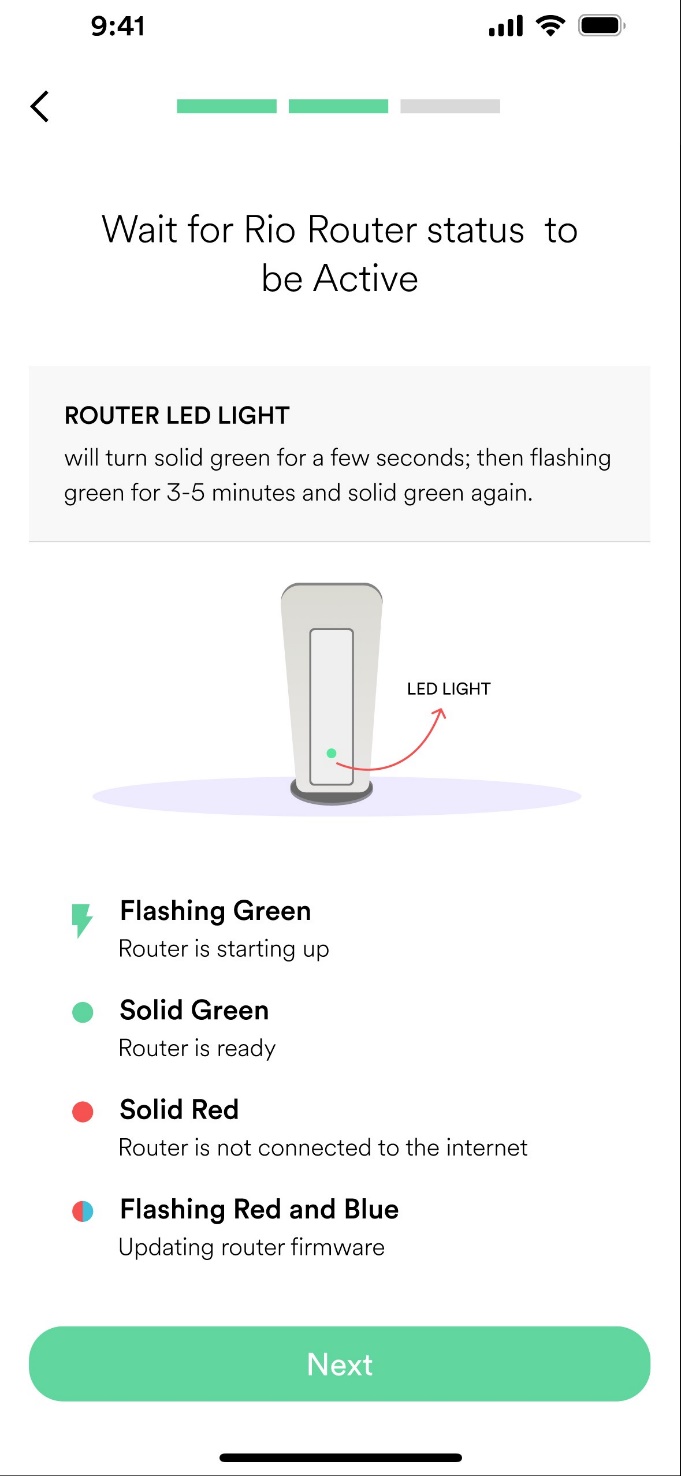
From there you will see the light on the front of your Rio turn solid green for a moment, and then begin flashing green for 3-5 minutes, and then will turn solid green again.
Your Rio may also start flashing blue and red, but do not be alarmed! This is one of the exciting features of Rio. This is an automatic update that is free for the life of your purchase. Rio will continue delivering features and upgrades to your router at no additional cost.
Video 3: Now that your Rio is solid green, we are now ready to connect our first device.
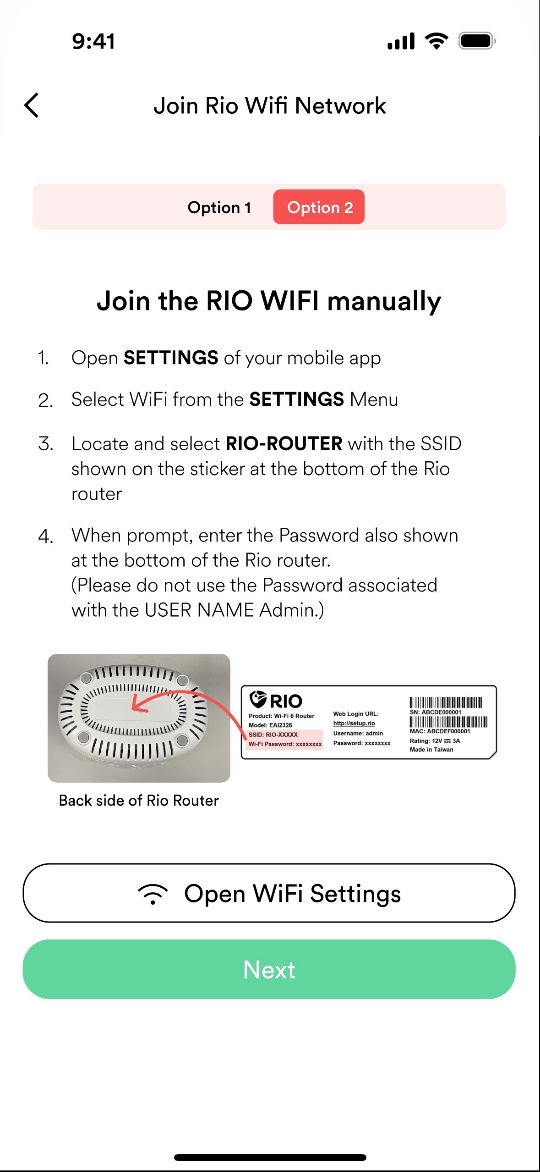
You will have 2 options to connect to the internet -- you can take your mobile device and scan the QR code on the back of the router to automatically connect by using your camera app, or enter it manually in the steps shown in option 2. 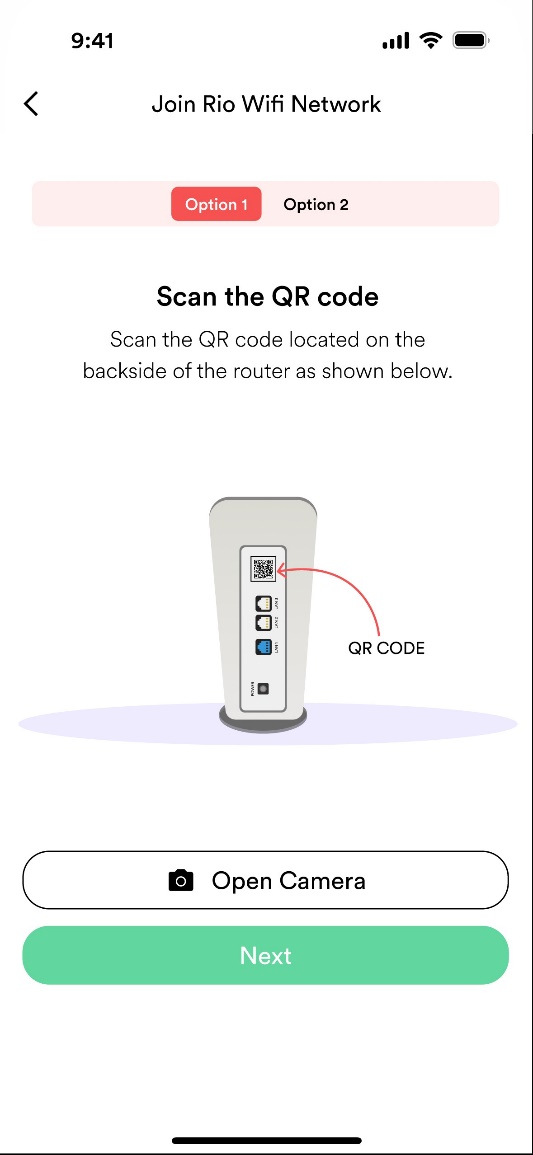
The first device we connect will automatically be approved as this will be your Admin device -- the king of the castle if you will. Any devices after will be halted by Rio's Allowlisting protection, meaning they will need to be approved in order to enter your network. Also don't worry, you can add an additional Admin device later on, that way you're not married to your one device to manage your network.
Now that we have internet access, you will also need to enter the admin password found at the bottom of your Rio Router (this is also shown in the app). This is so you have full control over your RIO routers capabilities. 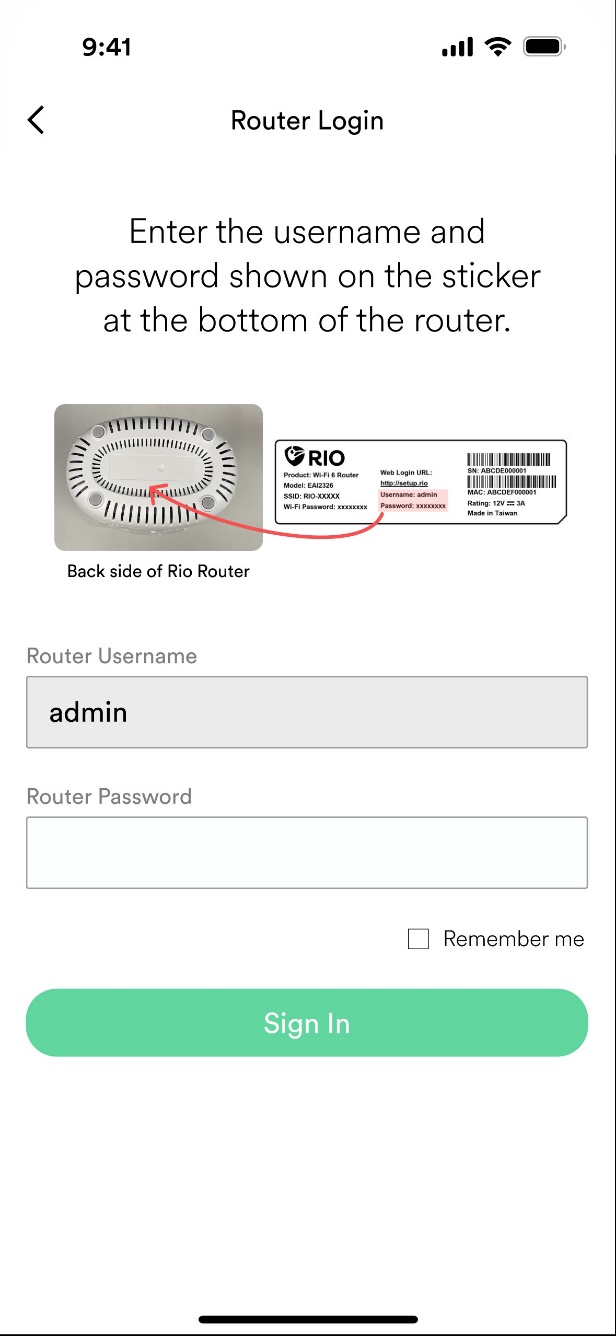
Once you've put in the password, click sign in, and then you will be asked to change the Router password to something you prefer. 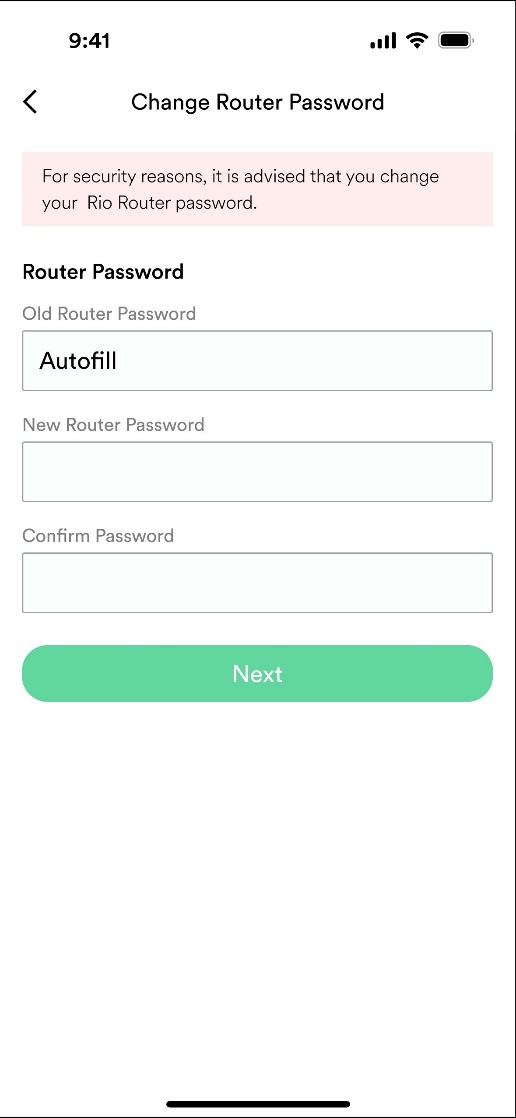
Congratulations! Now that your first device is connected you can begin connecting others to the router by sharing the password or go head on over to your Rio dashboard.
Video 4: Connecting additional devices with RIO is simple but before we go into how you can connect more devices; you'll need to know what an SSID and SecureRoom is.
RIO comes equipped with 4 SSID or what you may know as WiFi network names.
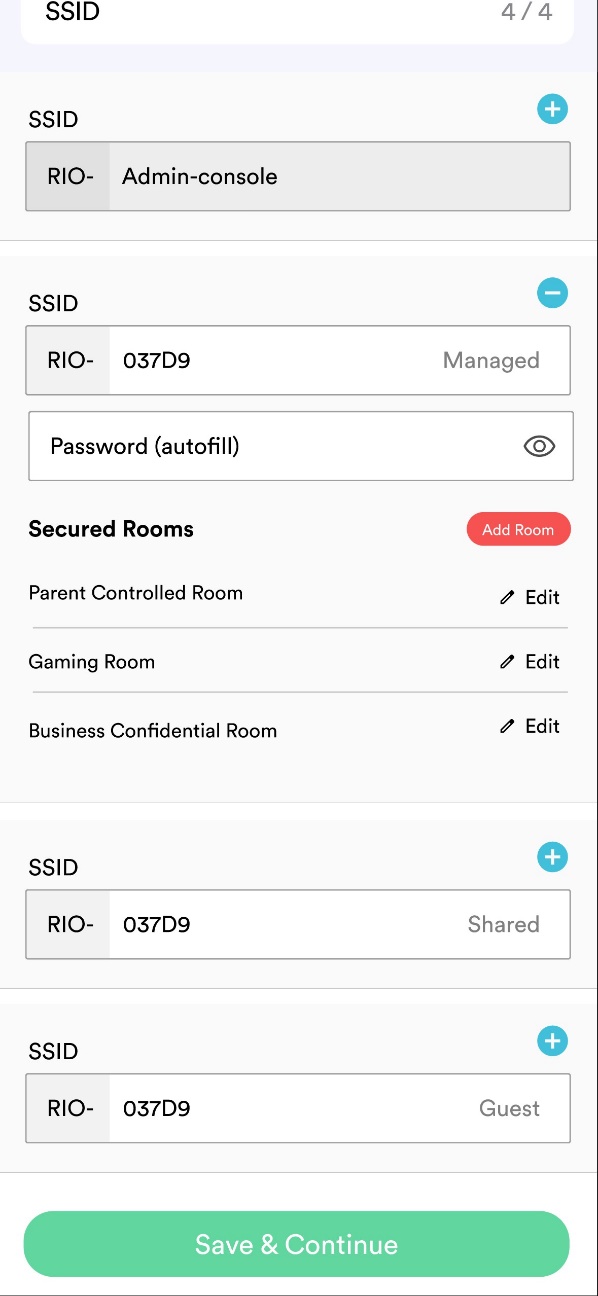
You have the ability to change the name of all SSID's except the Admin SSID. This is so you always know which network is dedicated to the admin.
What is a SecureRoom? RIO's proprietary SecureRoom technology isolates approved devices so that they can only communicate with the devices found within the same room. This means that if a device is compromised, it cannot infect and move through your network to the other devices. RIO allows you to create up to 16 SecureRooms. RIO provides a handful of SecureRooms by default with the ability to add, remove, or even change the SecureRoom names except the Admin SecureRoom.
Video 5: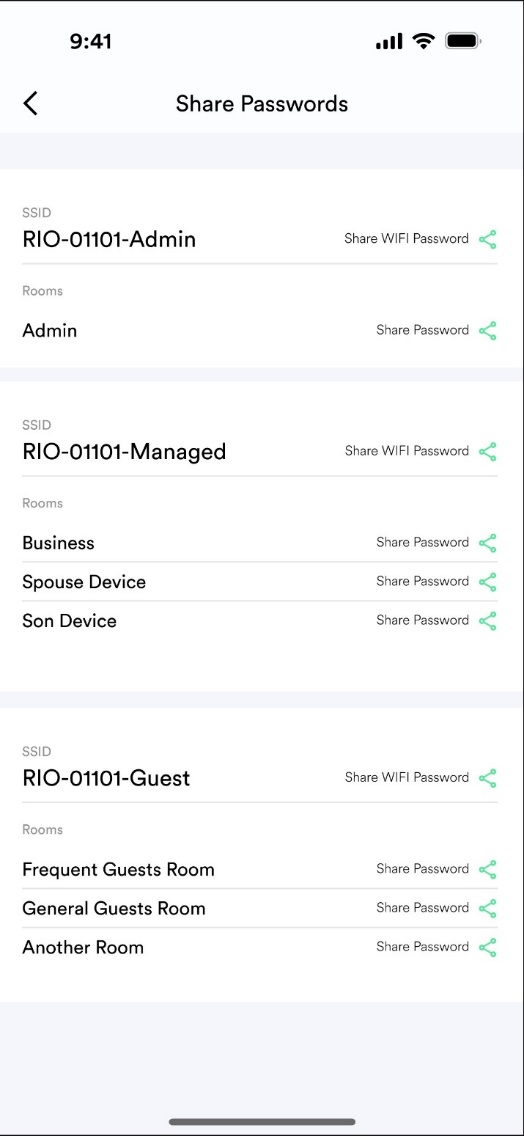

RIO allows you to seamlessly share passwords with friends, family, and guests automatically. With RIO, you are able to click on share passwords at the bottom of the dashboard, select what SecureRoom you'd like to have that device automatically approved and assigned to, and deliver the QR code via SMS text or email. You can also have guests scan the QR code shown off the app from the admin device.
Note: When sharing password QR codes, it is important to know what SecureRoom you want that device to be assigned to before sharing. Sharing the QR code for the Admin SecureRoom would grant complete access over your network, creating a major vulnerability and risk.
Video 6: Unlike the traditional router, Rio's proprietary zero trust security requires any new device attempting to connect to your WiFi network to be approved by YOU. As you may know, attackers can easily gain access to your network by figuring out your router password, and then they can gain access to every single device connected to it. Maneuvering through the network unseen and invading your privacy such as recording, watching, and stealing your data. With RIO, even if someone stole your password -- they are unable to get access to your digital fortress.
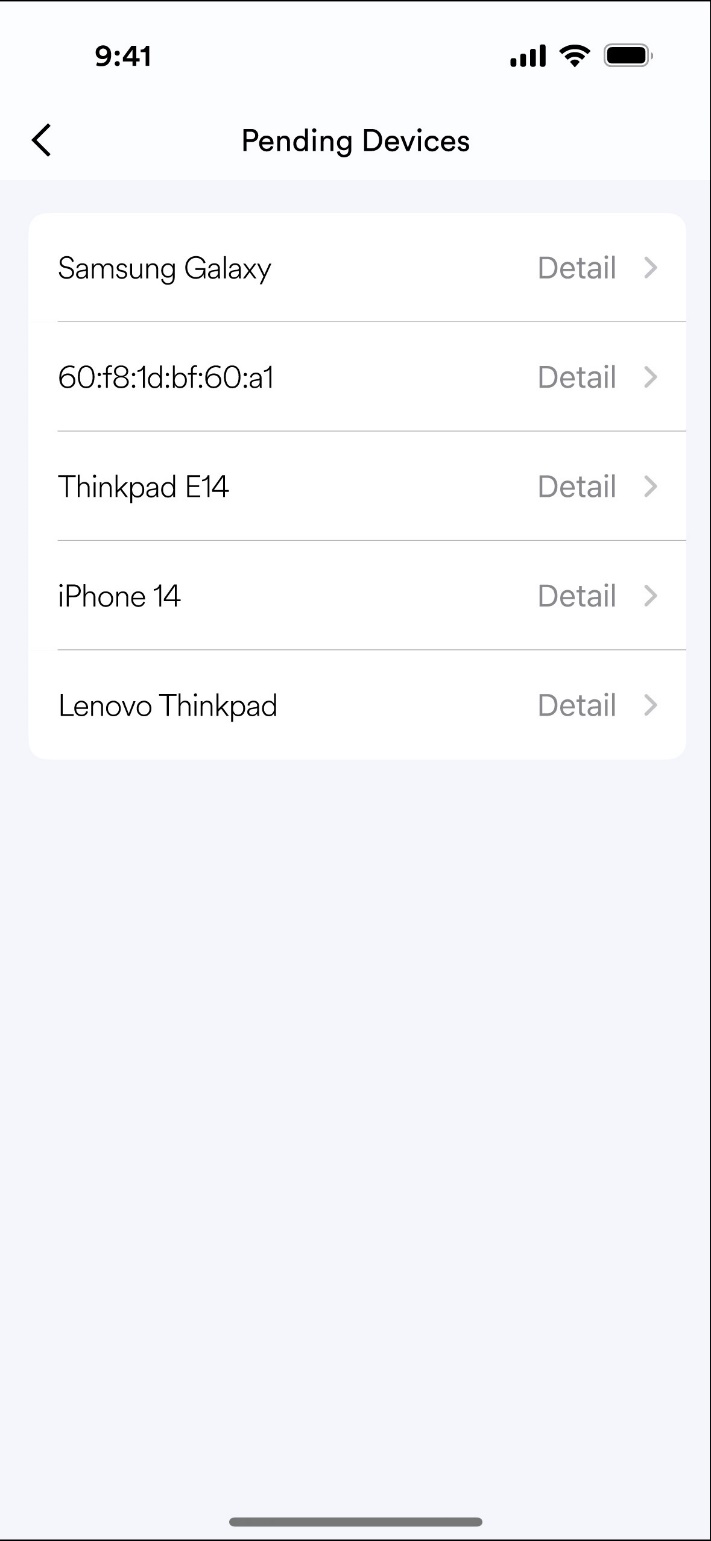
Any unauthorized connection attempt will deliver a real-time notification to your mobile device letting you know someone is trying to connect. Using your app, you are able to approve or block the device. If you do not make a decision within 5 minutes, the device will automatically be declined. If the device attempting to connect has a web browser such as computer, tablet, or phone, they will also receive a notification letting them know they are awaiting admission.
When approving a device, you can go to your dashboard, click on pending admittance, find the device waiting to be approved and click detail. If you know the Device, you should change the device name to something you can recognize, like Janes iPhone or Johns Laptop. You can either approve as guest or approve and move to a dedicated SecureRoom.
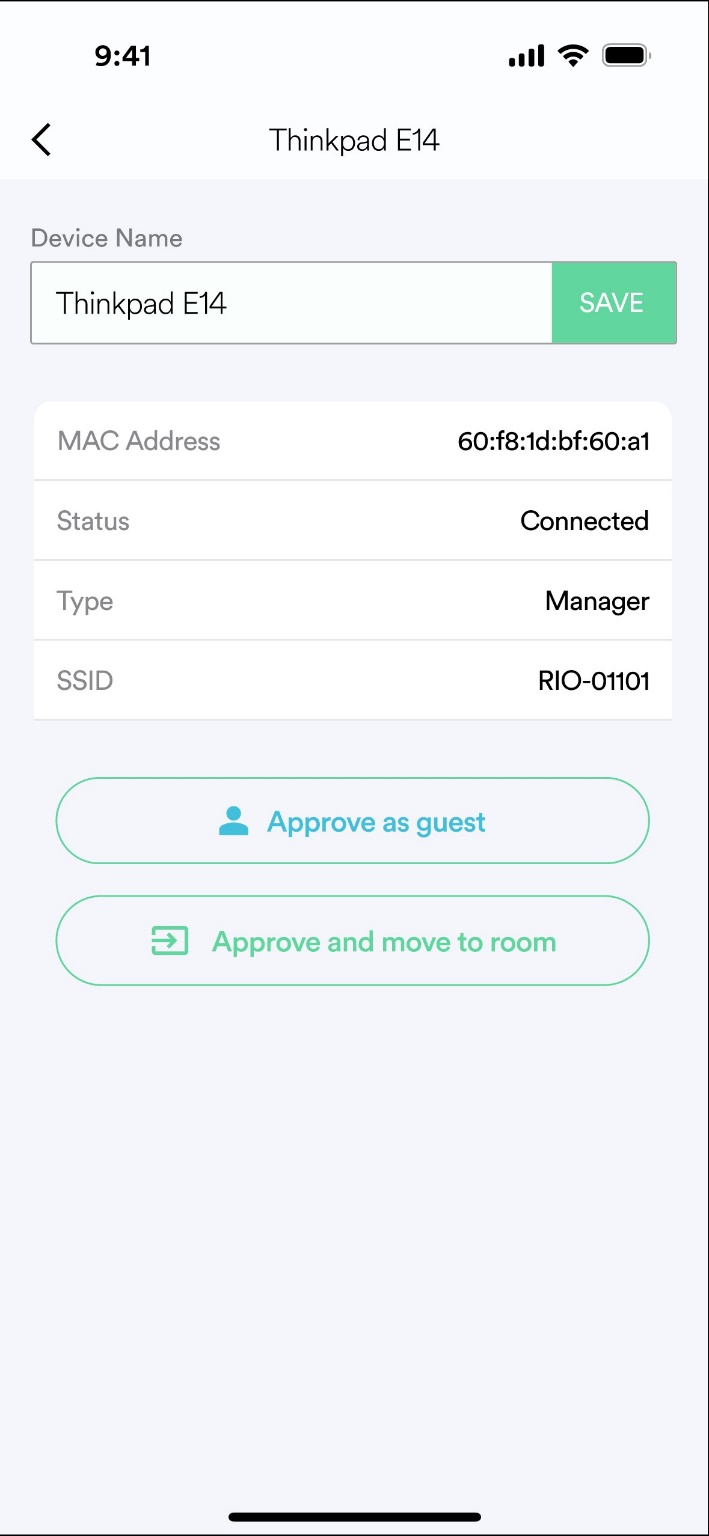
When you approve as guest, once the device exits the network -- they will be required to be approved again when they attempt to enter. This security feature gives you peace of mind against devices or people you're not too sure about.
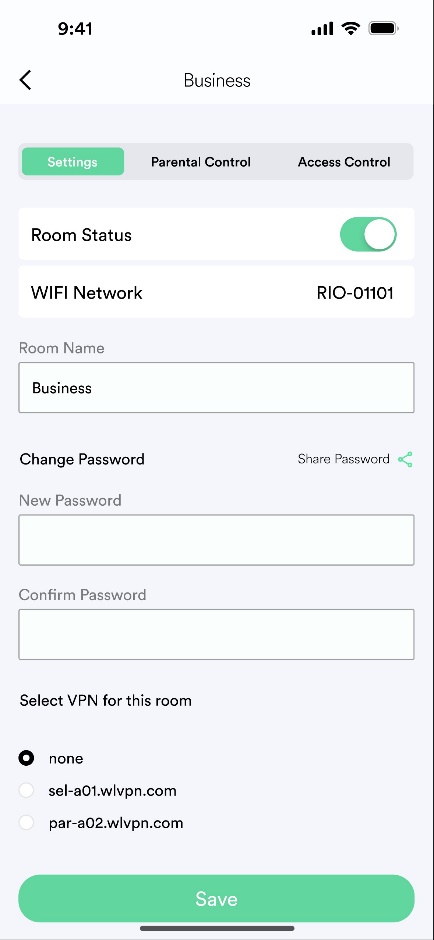
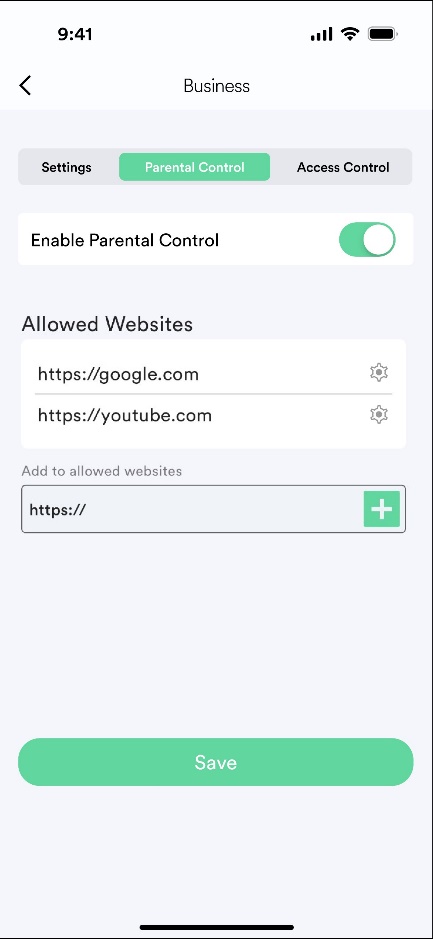
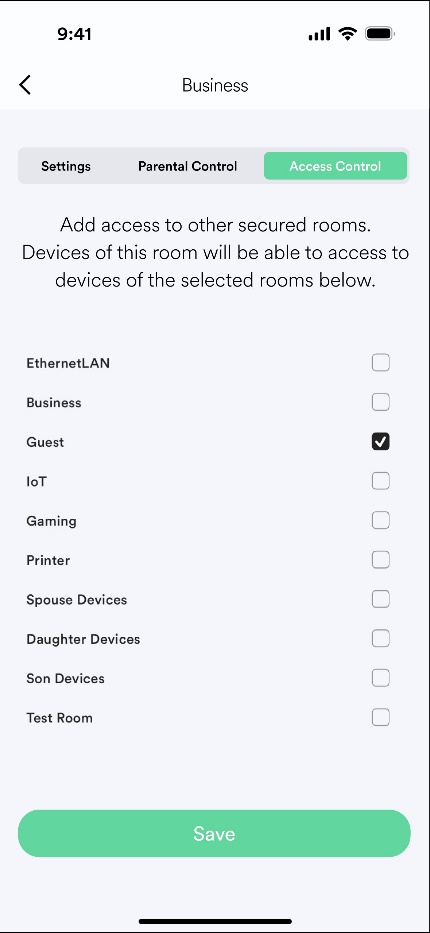
Video 7: Each dedicated SecureRoom can have fully customizable settings for your preference. Settings such as turning on RIOs allowlisting parental controls so devices in that room can only visit certain websites, be on a certain VPN location, or even have the ability to talk to other devices in other rooms such as a printer found in your office.
In every SecureRoom, you can also take advantage of RIO's dual access password control. This feature allows you to change the password to the SecureRoom rather than the entire router. When changing your password, youll only need to relogin to those devices in that room. This is a huge relief vs changing your router password and having to re-log in on EVERY single device.
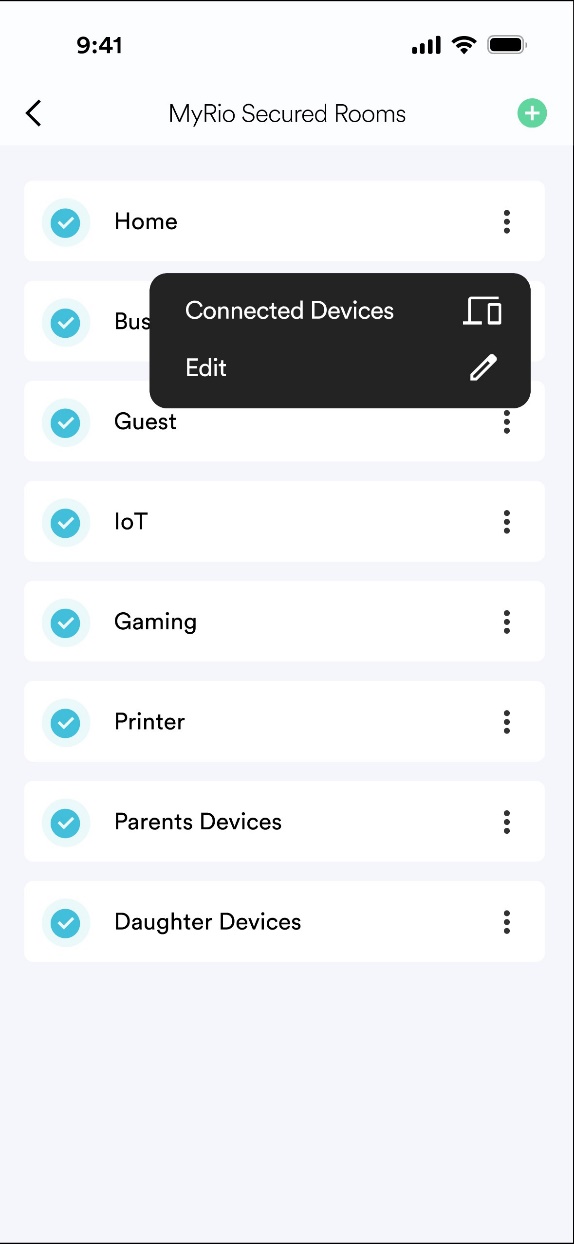
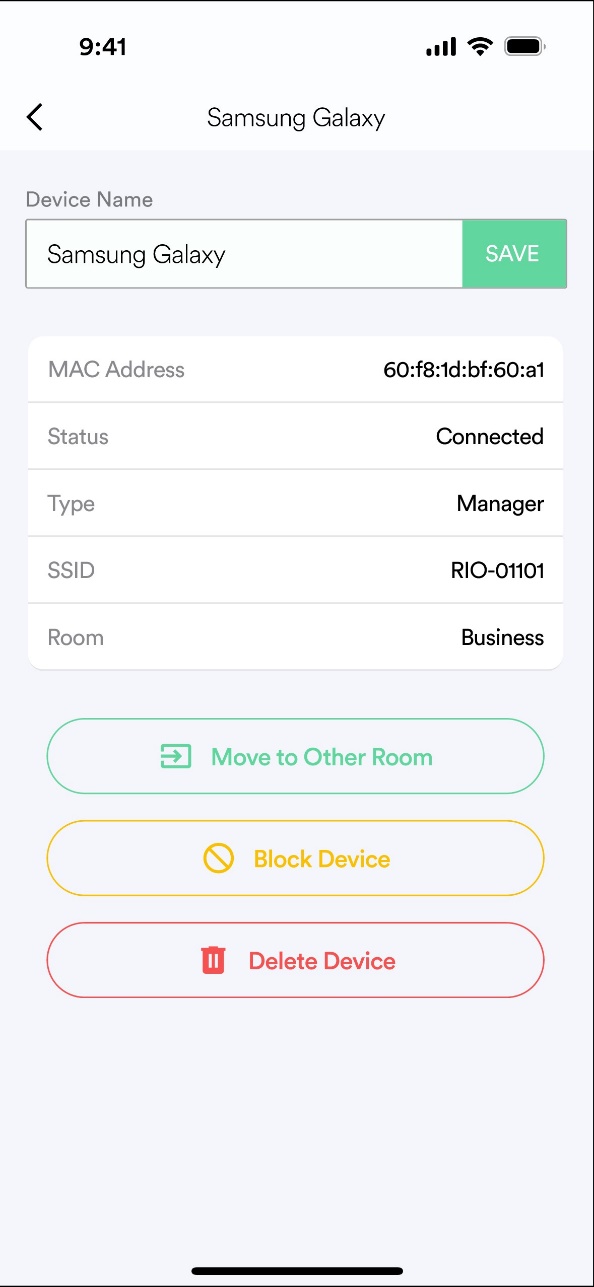
To view these room settings or manage what devices are in a room, click on room management on your dashboard, then click on connected devices. You will be able to edit the device name, move them to another room, or block and delete the device entirely.
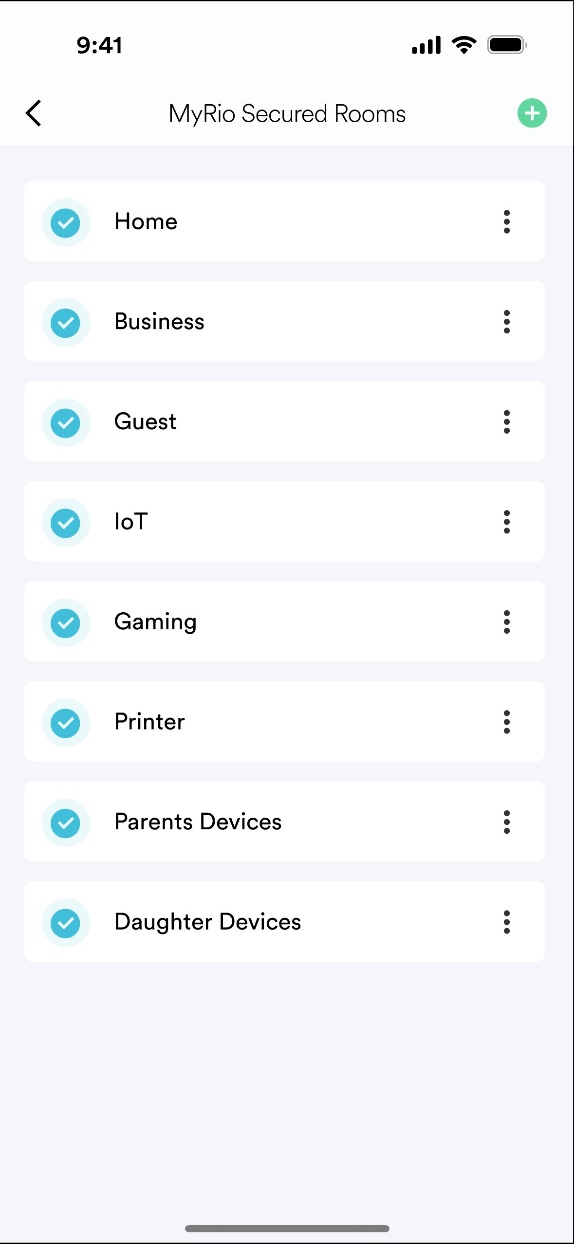
Devices in the Admin SecureRoom cannot be moved to another SecureRoom for security purposes. However, Devices not in the Admin SecureRoom can be moved by the Admin at anytime to other SecureRooms.
Fun Rio Tip: If you're a small business owner, you can use RIO to protect your business and implement parental controls on your employees. This way they can only go to the websites you want them to visit, and not be unproductive on social media or shopping websites.
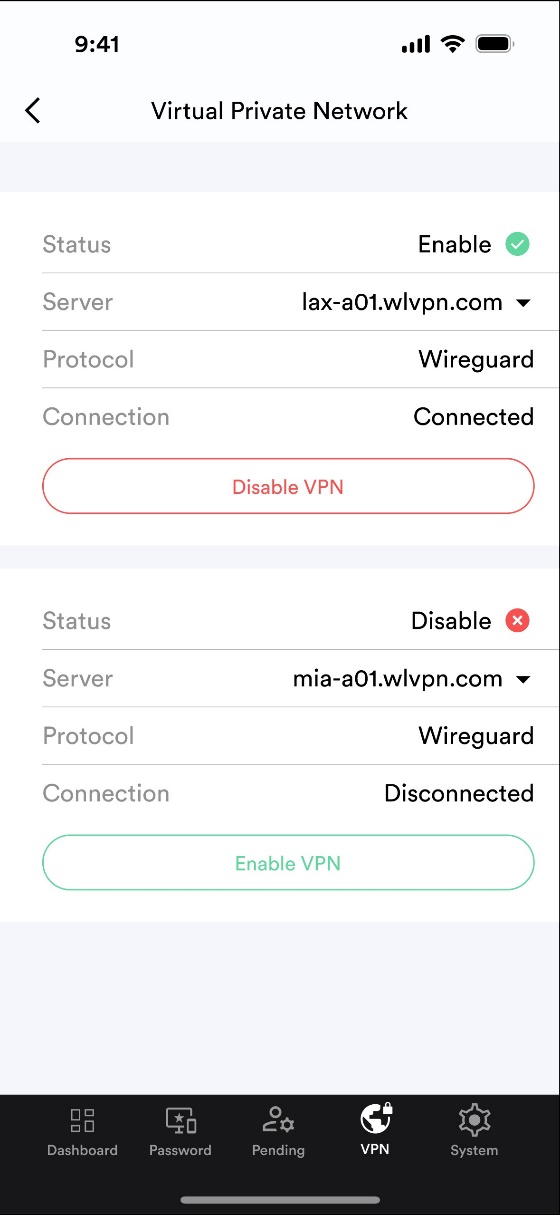
Video 8: With every RIO purchase, you get 12 months free of RIO VPN. RIO's next-gen VPN is not only the fastest, but also built into your RIO router so that any device connecting to the router can now receive the benefits of VPN encryption. This feature is revolutionary as devices that once could not get a VPN installed on them such as smart home devices, security cameras, baby monitors, can now have full online privacy and security. This means that all your devices internet connections are completely private so nobody can find out who you are or where you are.
Your RIO VPN account is automatically setup with the same credentials you used to make your RIO account in the first place. To enter your VPN account, click on VPN found at the top or bottom of your RIO dashboard. Enter the credentials to your VPN account, click save, and youre ready to experience online privacy on all of your devices without having to install a VPN on that device.
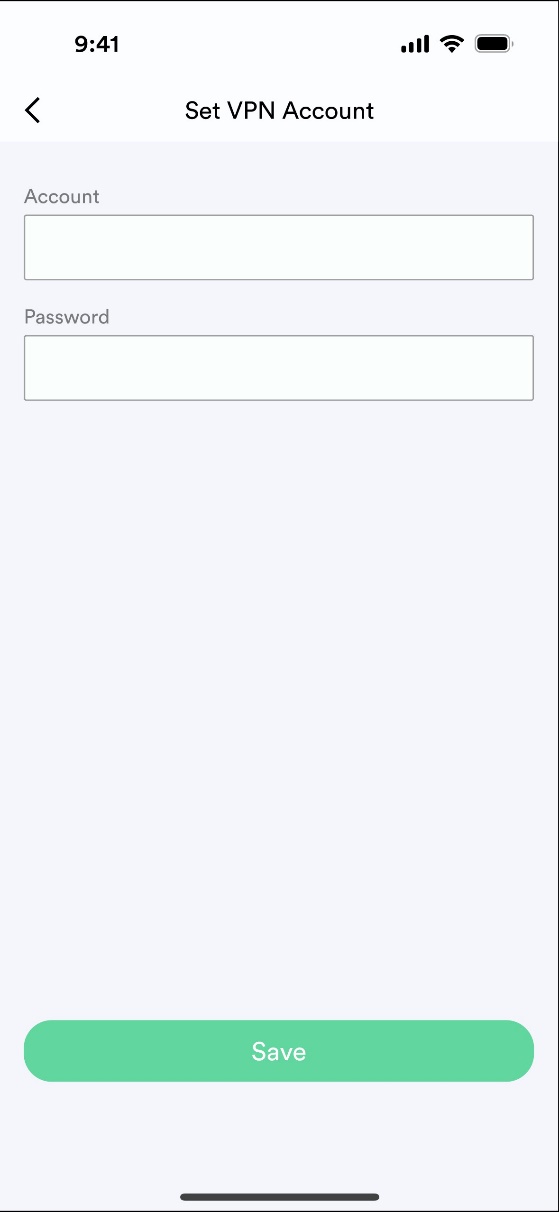
If you already have a VPN subscription with another provider, no need to worry! RIO works with all other major VPN providers so you can just put in your VPN credentials the same way and get VPN protection on all your WiFi connected devices.
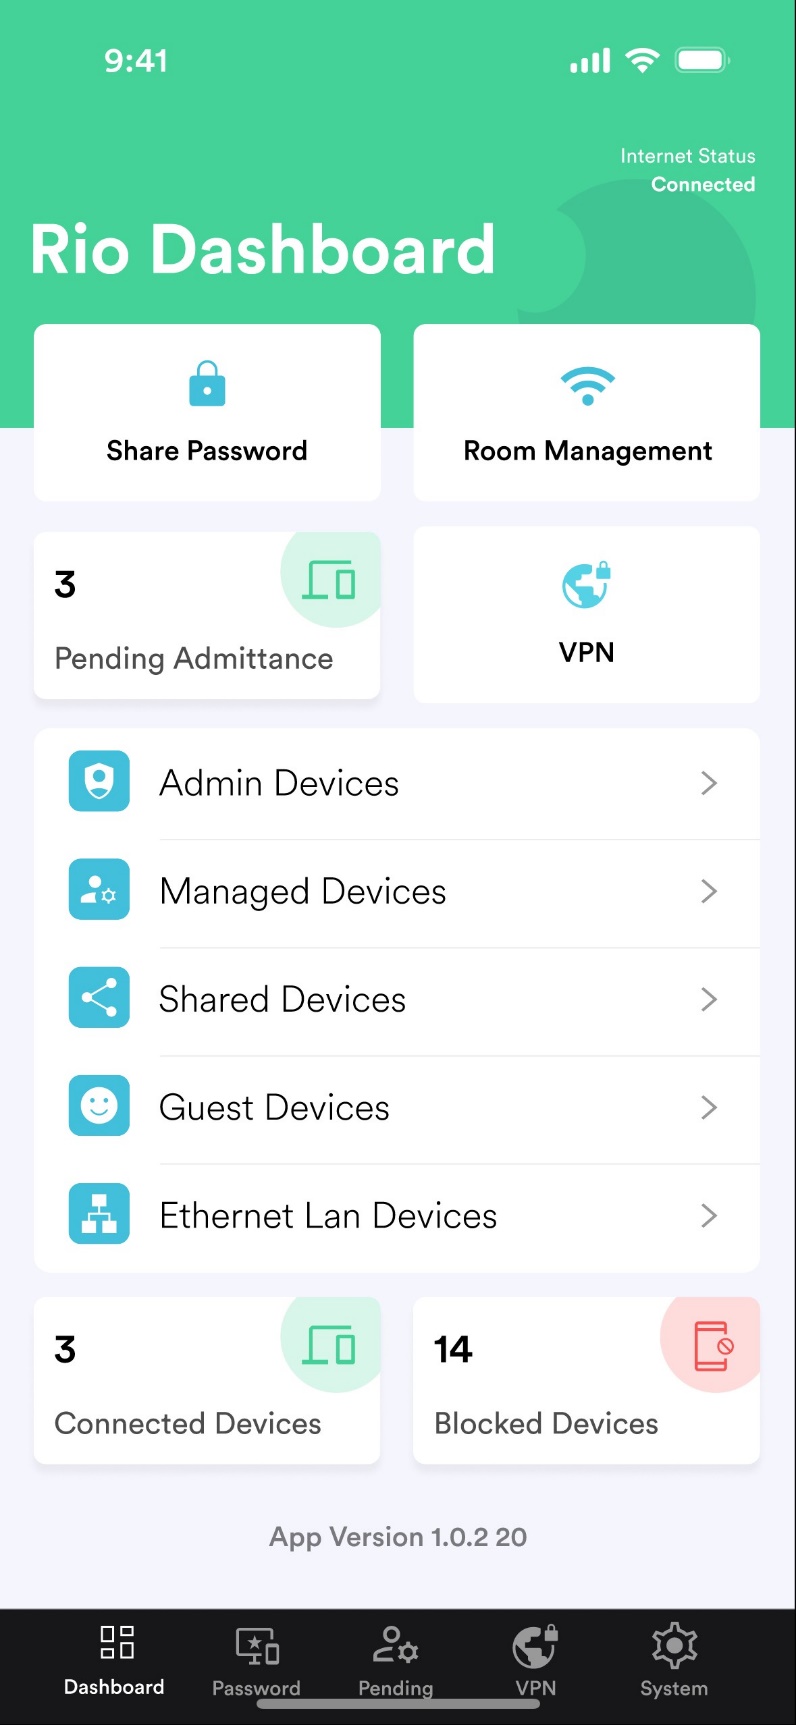
Video 9: Managing and keeping inventory of all your connected devices is simple with RIO. From isolating devices to SecureRooms, to ensuring all your devices can connect to a shared device such as a printer. You have full control over your entire network.
Ethernet Lan Devices -- This will show all the devices connected directly to the router via Ethernet, instead of connecting wirelessly.
Admin Devices: This will show what device has the Admin rights, which includes the initial device you used to setup your Rio.
Shared Devices: The shared devices section shows what devices are allowed to be accessed from other SecureRooms. Examples of shared devices include printers, baby monitors, etc.
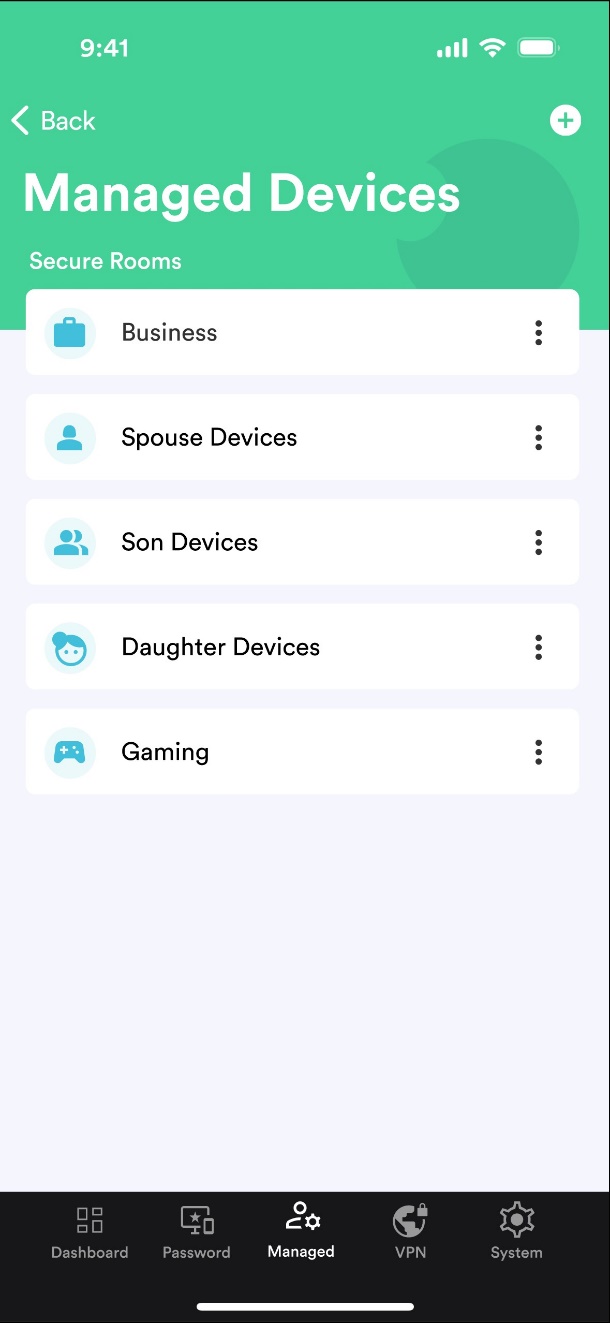
Managed Devices: This section displays all devices that have been assigned to a SecureRoom with implemented security policies.
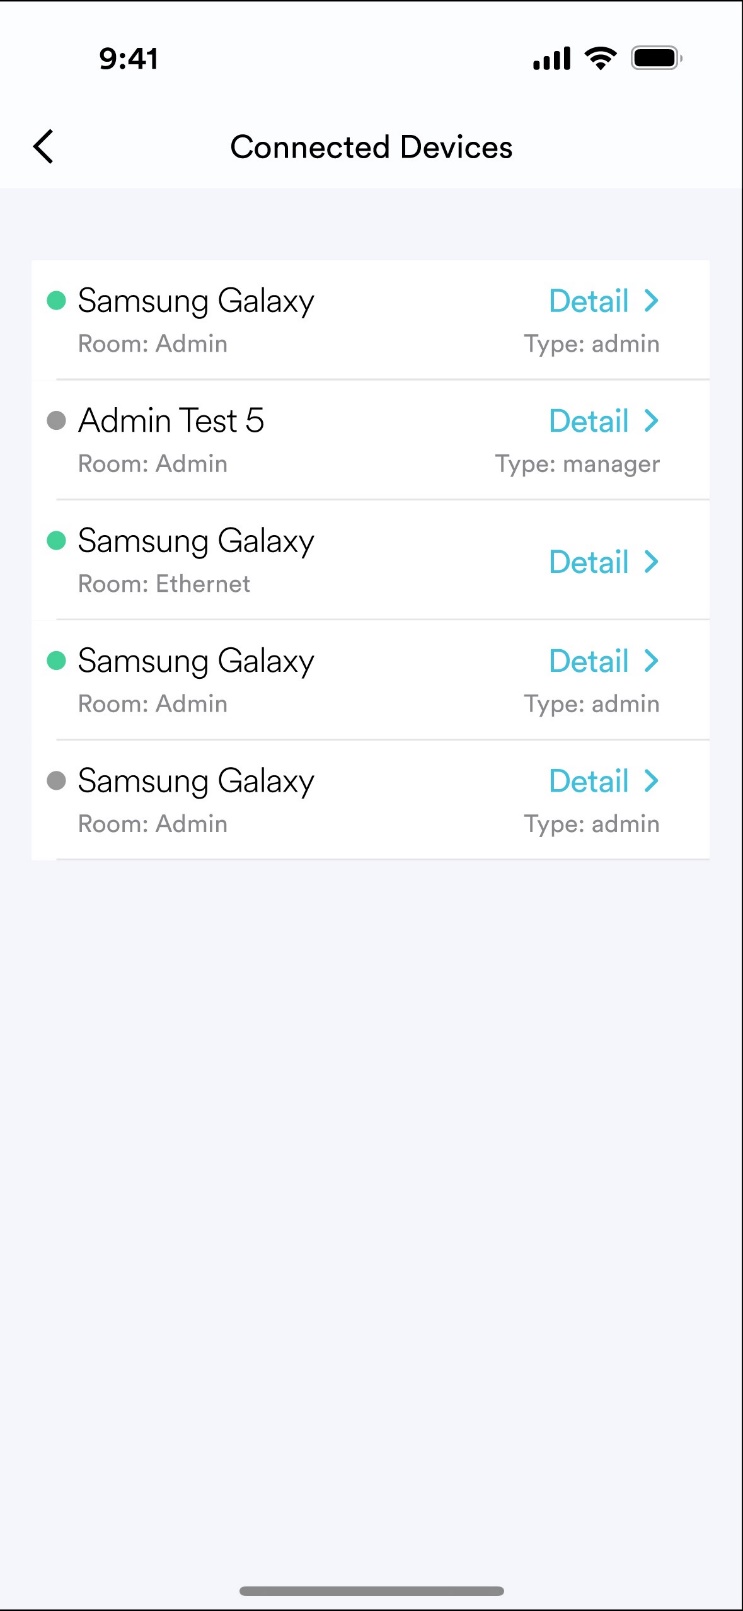
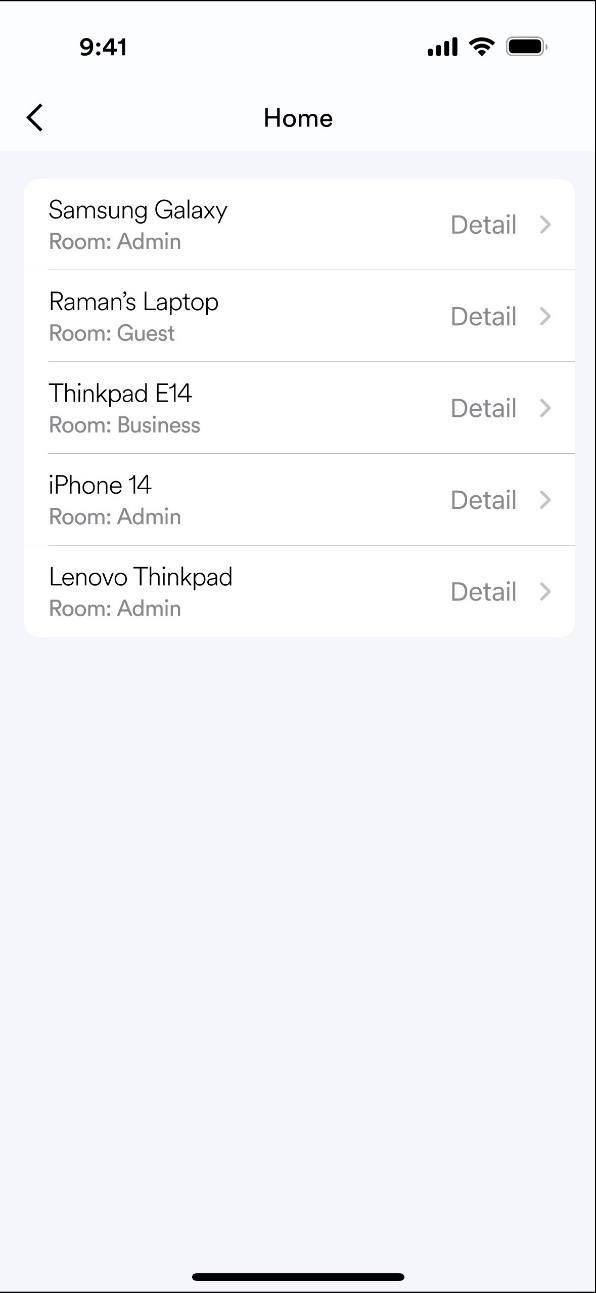
Connected Devices: This section displays all of your connected devices and what SecureRoom they belong to. You can edit the devices to change their name, security policies, and SecureRoom location.
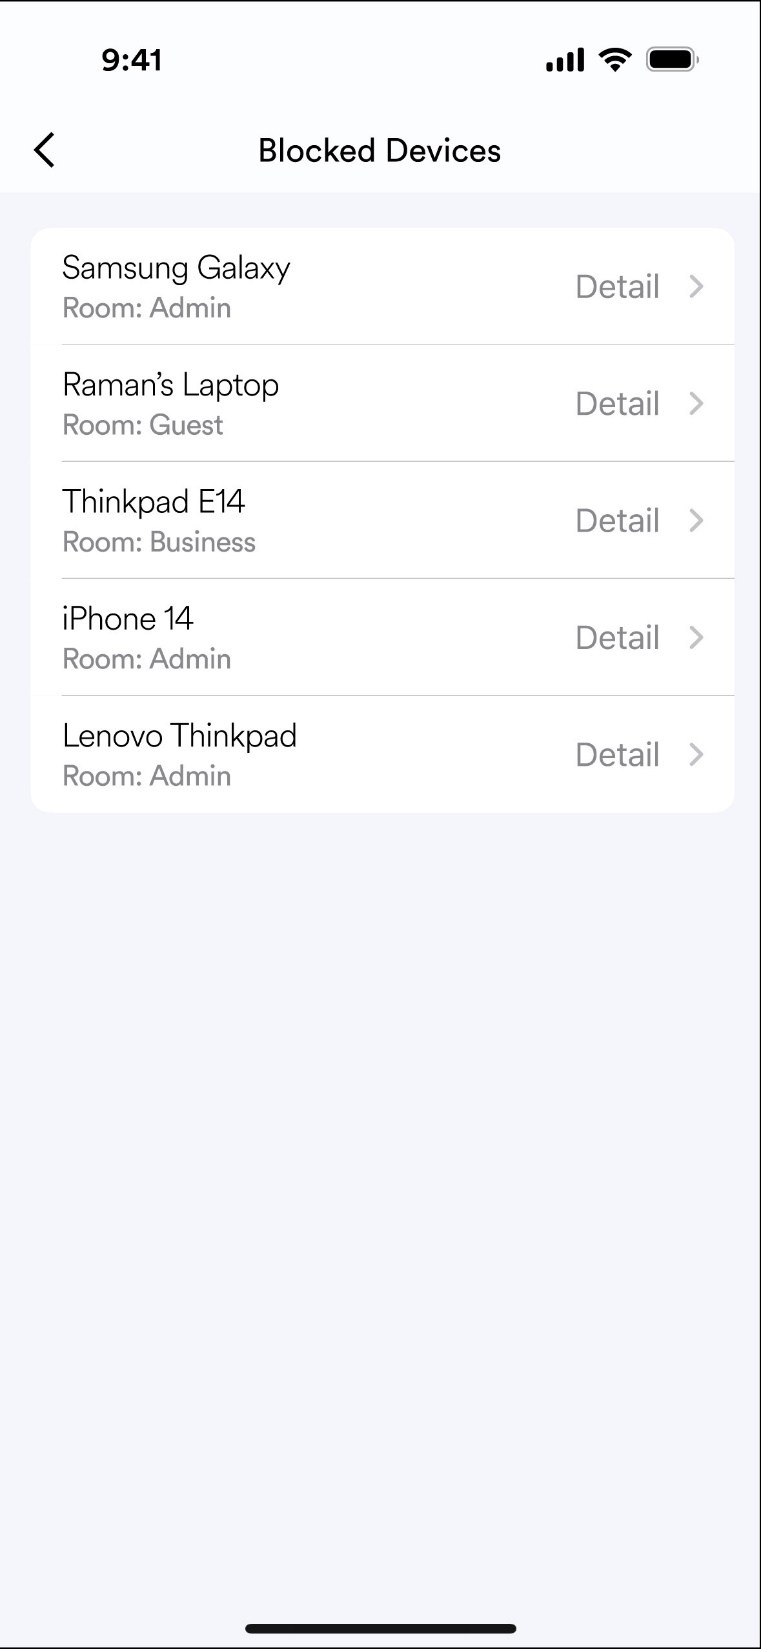
Blocked Devices: When clicking on Blocked devices, it will give you a lifetime inventory of what devices you have deemed malicious or unauthorized and chose to deny them.
Video 10: Access RIO Remotely through Wide Area Network Access
RIO allows the option to remote access into your Router through what is call WAN or your Wide Area Network. This is a setting that not everybody wants to take advantage of, so for that we have turned this off by default -- but allow you the ability to turn it on through your RIO mobile app.
Routers are notorious to remote hacking and cyber attacks through remote access vulnerabilities. The RIO difference is that even if a remote hacker has your router password, they will still not be able to gain access due to RIO's allowlisting protection. Giving you all the convenience without compromising your cybersecurity.
Video 11: I hope these videos have helped you understand the unparalleled security and supreme power your Rio router possesses. If you need any additional assistance or information, please feel free to reach out to us on our customer support line phone number listed in the quick start guide found in your Rio box, and also listed on the screen. Visit our website at riorouter.com for more informa. Enjoy the Rio difference.
FAQ for AI :
What are the Specifications of the RIO:
Wi-Fi Specifications
WIFI 6
• 2.4GHz 802.11b/g/n/ax
• 5GHz 802.11a/n/ac/ax
Supported Rates • 802.11ax: 4 to 2400 Mbps
• 802.11ac: 6.5 to 1732 Mbps
• 802.11n: 6.5 to 600 Mbps
• 802.11a: 6 to 54 Mbps
• 802.11g: 6 to 54 Mbps
• 802.11b: 1 to 11 Mbps
RadioChains • 4 x 4: 4
SpatialStreams • 4 for both SU-MIMO & MU-MIMO
Antenna • Up to 5.0 dBi
Max Phy Rate • 2.4GHz : 1148 Mbps
• 5GHz : 2400 Mbps
Maximum transmit power • 2.4 GHz:Up to 27dBm (combined power)
• 5 GHz: Up to 27dBm (combined power)
Minimum receiver sensitivity • 2.4GHz HT20/VHT20/HE20 : -93dBm @MCS0
• 2.4GHz HT40/VHT40/HE40 : -94dBm @MCS0
• 5GHz VHT20/HE20 : -95dBm @ MCS0
• 5GHz VHT40/HE40 : -93dBm @ MCS0
• 5GHz VHT80/HE80 : -89dBm @ MCS0
Max Number of Clients • Up to 128 per radio
SSIDs • Up to 4 per radio
Physical
CPU • Qualcomm IPQ8072A Quad ARM Cortex A53 64bit @2.2GHz
DRAM • DDR4 DRAM : 1GB
Flash • eMMC : 8GB
Power Input • DC input: 12V
Dimensions • 231 mm (H) x 150 mm (L) x 100mm (W)
Weight • 900 g
Interfaces • 3x100/1000 Base-T Ethernet, RJ-45
LED Indicator • 1x Tri-Color LED Indicator: Power/Status
Buttons • ON/OFF, Reset ,WPS
Max. Power Consumption • 20 W
Environmental Conditions • Operating Temperature: 0°C to 40°C
• Operating Humidity: 10% to 95% non-condensing
• Storage Temperature: -40°C to 80°C
• Storage Humidity: 5% to 95% non-condensing
Antenna type • 4 x internal dual-band Wi-Fiantenna
Mounting • Desktop
How do I setup Mesh WiFi extension with RIO?
Adding WiFi Extenders or Mesh to your RIO router has never been easier before. To add an extender, you must install another RIO router. Once installed, click on system found at the bottom of your dashboard. Select the newly added router, and select Mesh Mode as Extender. Your original router will need to be selected as controller.
How many networks can I setup?
RIO allows you the ability to create up to 4 separate networks. You can change the network names, passwords, and what devices are connected all within your RIO mobile app.
How many SSID's can I setup?
RIO allows you the ability to create up to 4 separate SSID or networks. You can change the SSID names, passwords, and what devices are connected all within your RIO mobile app.